It's that time of the year again! Get ready for Halloween treats! Now, anyone who knows me, knows that I am frugal. Last year, around this time, my husband's work hours were getting cut and we still have kids who want to take treats into school. So, I had to think fast how to do something adorable but with little money and little time. I made a Pumpkin Patch...and this year, I will show you how.
Items you will need: Styrofoam block, Mod Podge, Circle Punch, Paper, Ink, Stamps, Scissors, Adhesive and Suckers.

Step 1. Cut out 4 pieces of paper that match the size of your block. This will be your grass. Do not cut a piece of paper for the top surface. You need to be able to push your sucker sticks in there easily.

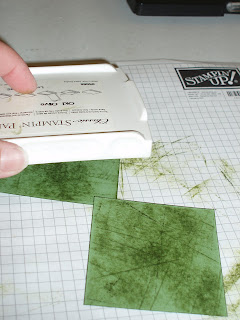
Step 2. Rub your ink all over your cut paper to give your grass some definition. I used a shade darker than my paper.

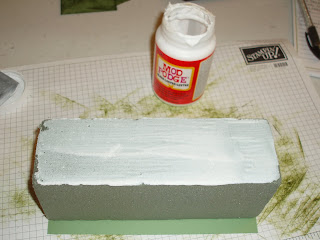
Step 3. Cover your block one side at a time with Mod Podge and glue your paper down. It will be much easier if you let each side dry completely before moving onto the next side. *Note: You may need to put a heavy book on the glued area to keep the paper flat against your foam block.

Step 4. While the glue is drying, begin punching out your circles for the pumpkins and stamp your images on the circles.

Step 5. Glue your pumpkins onto your suckers with regular adhesive.

Step 6. Now that your grass is glued to your foam block and is dry, go ahead and cut slits into the grass and fan it out by brushing your hand gently over the cuts you made (think preschool days here).

Step 7. Push your suckers down into your block and different levels and you have created your pumpkin patch!


1 comment:
This is so cute - I love it!
Post a Comment